Saturday, April 26, 2014

Betchin' Basement Renovation Mostly Done

Photos of the new basement.
It's divided into two areas, kids play area and the theater.

Here's the before. The carpet was ruined after an animal got inside and the carpet had to be ripped out.
I blogged about the DIY hanging art gallery system shown below here.


The DIY entertainment center play kitchen blog post can be found here.


We ripped out the dated lights on the theater side and replaced them with canned lighting. Also added a remote controlled Lutron light switch ($40), so we can dim the theater lights from the couch.

The sectionals are from Ashley Furniture in Logan ($1300). They have the best prices BY FAR.
We love this couch. The seats are big enough for two and recline.


TV is a 60 inch plasma. We were worried about the size but it is actually perfect for the viewing distance of about 8-9 feet.

The Nintendo case in the entertainment center above is going to house my HTPC and the room is wired for surround sound.


I textured the walls myself. It was a ton of fun!
We tried painting the far wall indigo blue, but the color clashed with the grey and looked awful. The original mud job was terrible and the semigloss showed off every flaw. We had to re-texture and repaint everything.


Things left to finish

Buy and install audio receiver and surround sound
Build HTPC
Buy mini-fridge and stock with Dew!
Touch up paint
Popcorn popper
Movie Posters

Friday, April 25, 2014

Cheap Hanging Gallery System

The hanging gallery system is finally finished and it works great!


The wife and I have some art we are proud of and wanted to increase our collection from some of our artsy friends. The old wood paneling in the basement was hideous and had to be painted over. We wanted a space where we could hang and adjust art easily, without putting lots of holes in the wood paneling that would be annoying to patch/paint.

Most hanging gallery systems are fairly expensive ($100-$200 per 6 feet). Here are some examples of what we were trying to emulate:


The other alternative was gallery molding.
(We found this to be a little too dated, but might be a great cheep option if you want something that looks a little more traditional)


We wanted something that felt modern but wouldn't cost $200 or more. Here is the final solution.

Total Cost     $100

Materials for Rail
Aluminum c-channel x 5     $45
     Each rail is 96 inches and $9. You might be able to find a similarly priced j-channel for easier install.
Corner Braces (4 per pack) x 5     $10
     I used about 1 every other stud or 4 per 8 foot track.
Hacksaw
Metal File
Drill
Measuring Tape
Screws


Materials for Hangers

Hanging wire     $10
     We tried 40 lb and 25 lb wire. Both worked fine.
Ferrule and Stop Set (x5)     $7
Metal Mirror Hooks 4 per pack (x3)      $15
Grounding Lugs 4 per pack (x3)     $12
Needle Nose Pliers
Hammer


Rail Instructions

Screw L brackets spaced appropriately along the wall. One at each end, and spaced every few feet in-between.


Measure, cut and pre-drill rails.


Screw rails to brackets. And done.


Hanger Instructions
Measure the length of wire. I cut them long enough so that we can hang 2 pictures from a wire when we get enough art to expand and double up.
Attach the wire with the ferrules.


A few taps with a hammer helps the hooks hold tighter.


For the adjustable hooks we used copper ground lugs, found in the electrical section. They are made for much larger wire but can hold thin picture wire if you flip the center around and give it a few taps with a hammer.

They come like this:


But you can flip them around like this:


Then bend the bottom to become a hook that looks like this:


If you leave the end straight it is the perfect width to fit under sawtooth hangers.


You can see the wire is held securely by tightening the screw.


Here is picture of the final gallery. There is plenty of room to expand as our collection grows.

Monday, December 2, 2013

The Betch is back at work.

So we had a little money left over from our budget recently due to some gratuitous gifts from family. We figured with a tight budget we should do something to improve our Christmas this year that will stick around. Our fireplace was rather barren with crappy white painted brick, and no where to hang stockings.

We needed a mantle.

We shopped around and priced some places, 80$ per foot! We wanted around 5 feet, so a grand total of $300-$450. There are premade options available for order in the $200 range but still ridiculous and not much in our style. After browsing the few blogsites that made their own floating shelf mantles (seriously, why is there not more info?) I decided I could totally do it.

Shopping List:
8 feet of 1x8 pine ... 20.00
6 feet of 1x6 pine ... 17.00
5 feet of common board. 1x6  ... 4.00
10 feet of simple molding ... 10.00
(not in the stainable quality area, just the regular junk at Home Depot and a lot cheaper, you can't tell).
2x4 ... 3.00
Ebony Stain ... 8.00
Polyurethane ... 11.00

Total: 80.00 (right on target)


Other stuff:
Cardboard box to make a model.
Miter Saw - got a new one at a garage sale for 10 bucks? That works so much better than a cutting box, which wouldn't have fit the pine planks anyway.
Hammer
Random nails
Screws
Socks for staining (by far work the best)
Shirt for wiping stain
Woodglue

Model
Originally I wanted the mantle to be 8 inches deep and 8 inches tall. I made a mock one out of cardboard and the dimensions were way too thick. I cut it down to 6 inches tall and 8 inches deep and it worked much better.

Plans
I am super lucky that we like simple lines. It made it a lot cheaper. I don't have a table saw so I planned everything out so I wouldn't have to cut anything lengthwise.

Construction
Pretty much nails, glue, and wood filler.


Staining
It took 2 coats of stain to get it dark enough while still being able to see the grain and 3 coats of polyurethane.


Installation
So not sure if I did this right. Saw a blog where they did it like this, then another that said you shouldn't. It took me forever to find the freakin' studs to mount it. Just kept drilling away. This isn't actually brick, they are just brick tiles glued onto the drywall, easier than worrying about all the crappy masonry stuff. Used a 2x4 and some screws to hold it. Tested the weight by hanging off it. Looks fairly stable.

Math stuff!
So we installed it the first time and I didn't like the height. So I checked some measurements. The ratios were off.


The length of the red section was just off of the length of the green. I figured the crappy 9:10 ratio was making it look super awkward, so enter

Phi is the golden ratio and is approximately 1.6180339887498948482... and is used in aesthetics. So I measured the fireplace (24 inches) and calculated a possible height for the shelf using phi, 1.618x=24 or 24/1.618 = 14.83. I measured 15 inches and tried it again and it looks so much better!


But not only that.
Check this out:
http://www.radovleugel.com/golden-ratio-calculator

For the measurement of 24 and 15 inches, 6 inches is also a close approximation (the height of the shelf) and the length is 61, just shy of 63. Look at all the golden ratios! YAY MATH


Anyway, so I got mad carpentry skillz. Super excited about how clean the corners look. They can be a betch.

Monday, August 13, 2012

Two more mini projects: Dresser

We found this dresser on the Cache Valley Classifieds facebook page and bought it for $10
When the wife got there it was in worse condition than we expected.  It wasn't real wood and it looked like it had been sitting outside and so there was visible water damage.

Labels
The sanding shows how bubbly the top had become.  All it needed was some spraypaint and finish.

You can still see the bubbles, even after a while of sanding.  But it turned out cute.

Saturday, July 28, 2012

Play Pantry:

Two blog posts in one day! After quitting both jobs now have some time to finish some projects.

This pantry was an awesome find. We talked it down to $10 and it came with a ton of cool toys; plates, utensils, toy food, tupperware, and juice pitchers. We found out that father of the lady who sold it made it for her when she was a girl, and she passed it down to her daughter. The thing is sturdy like a rock and they used copious amounts of polyurethane so it is virtually indestructible.  The only problem is that it looks terrible.
I painted it white and covered it with a thick layer of polyurethane. One thing we learned: CLEAR POLYURETHANE IS NOT CLEAR!  If you get too think of a layer it is yellow. Which means my white pantry turned out eggshell, and the color is uneven.  We will see how much it bugs me.

We used the rest of the dollar store contact paper for wall paper, and it turned out looking better than I thought.

Sorry the pictures are blurry.  The daughter got a hold of the camera, and junked up the lens.


How (not) to refinish a dresser

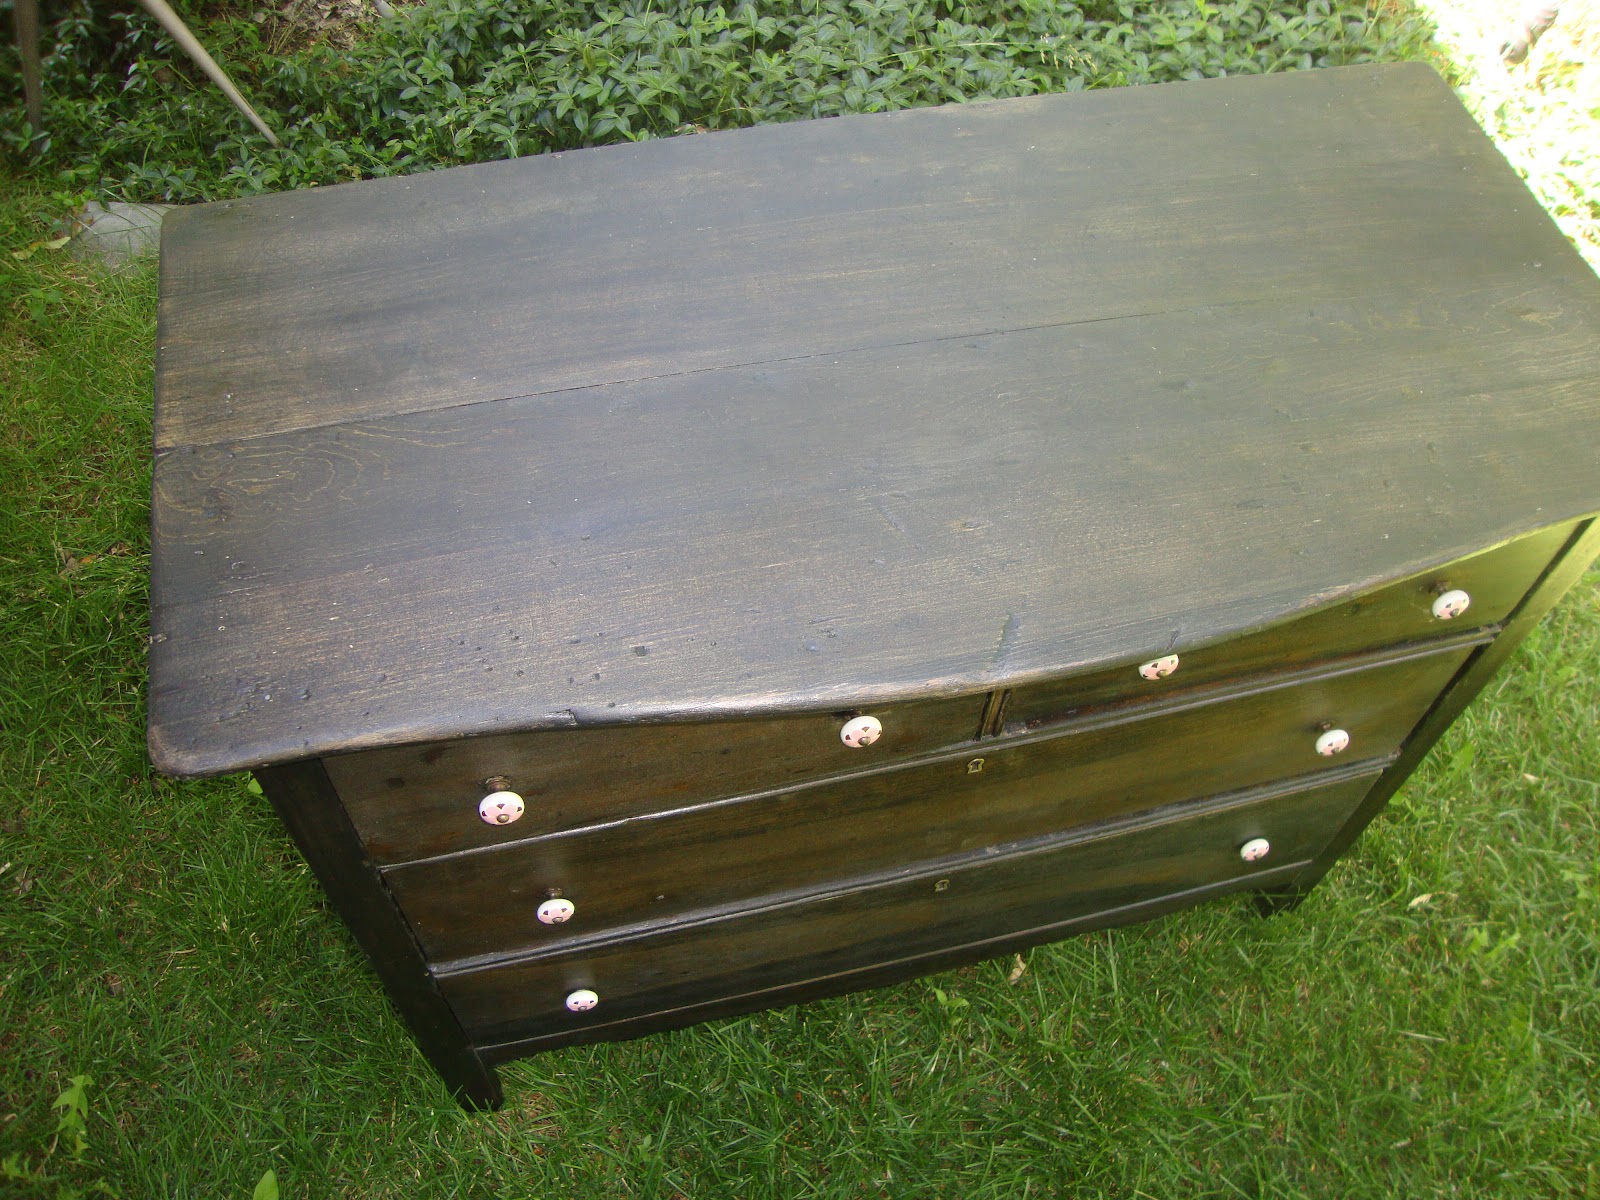
This was probably the most time consuming project ever. If at all possible do not attempt to strip and re-stain old beat-up furniture.  But if you must, here is what were did and learned.

Being a blogging n00b I forgot/lost the before pictures but here is one to help you get an idea of what we were working with.
We found this treasure at a garage sale and talked them down to 15 dollars, right before a bunch of Pinterest college kids swooped in to try and take it. If anything, Pinterest has turned this town into a bunch of crazy people (myself included).

What originally attracted us were these awesome glass or maybe ceramic knobs.
The previous owners had covered this in a thick layer of awful latex canary yellow paint.  You know that crappy paint job that makes it look slightly weathered? The dresser was very dinged up and there were deep grooves where it had, I assume, been dragged through Vietnam in the 50's then been assaulted by pygmies wielding machetes. I have never stripped furniture before and naively thought "how hard could it be?" and more appropriately "if I screw up it's a junky piece of furniture and I wont feel too bad."

Stripping:
Striping furniture is one of the worst things ever. Stripper comes in somewhat expensive cans and the best stuff we found has a jelly consistency and they all smell terrible. There are guides out there for which works best but in my experience they are all awful and it will be a terrible experience no matter what.

The first challenge is timing.  You want to put on a VERY thick layer of primer because it evaporates very quickly.  The payoff is you want it in a very ventilated place so you don't die, but the more open air the faster it dries. If you wait too long it will get gummy, and the dissolved paint will actually soak deeper into the wood creating more work. Some have recommended covering it with tinfoil for 50 min, but I had little luck with this and it dried out much faster.


What worked best for me was globing on a thick layer then letting it sit for about 10 min.  The paint will bubble up as it separates from the wood. Then using a sharp scrapper I was able to get giant sheets off at a time. The problem was I had to go back and pick out paint from all off the dings and cracks in the wood, and I had to go back over each area with medium and fine steel wool. It took days to finally get it all stripped.

Staining:
We wanted a darker stain, and I have had no experience with stain either.  The most important thing we learned here is to treat all of the wood the same.  I didn't sand all the parts evenly, and so they all stained at different rates and getting it all to match was terrible. We wanted a warm dark brown almost black color, and the parts that still had some of the old stain turned out great, but I had to sand and redo them :( The finished project ended up looking great though.

After everything it actually turned out alright!

We finished the drawers with some contact paper we got from the dollar store.

The final project looks awesome, even though it was a ton more work than anticipated, and certainly more expensive than I had hoped.

Cost:
Dresser - $15
Stripper - free (but total about $20)
Steel wool - free
Rubber gloves - free
Stain - $8
Contact Paper - 5 x $1